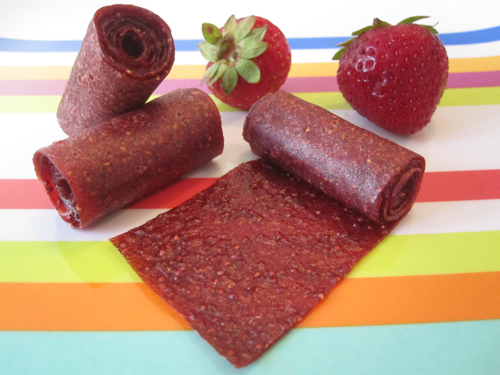
I’m not talking about those processed, cut-out rolls of food coloring and sugar. I’m talking about the easy peasy homemade ones! Master this, and you will be a pro in no time. Your kids and friends will think you are a superhero for actually making something so delicious and good for them.
I’m going to show you how to make berries puree jerky. That doesn’t mean you only have to make fruit jerky with the fruits I choose. You get to make these out of anything you want, that’s the fun part! Get creative, and use the fruits your family likes best!
CHOOSE WHOLE FOOD
Since the fruit is being concentrated down, it is a healthy choice to choose organic. You don’t want a fruit jerky filled with pesticides. As far as honey goes, the amount you use will depend on your taste buds and the fruit you choose. Since I prefer strawberry, cranberry and rhubarb, I used the whole 4 Tbsp of honey. Usually, I only add 2 Tbsp if I use sweeter fruit. The lemon juice will give any fruit flavor a pop! If your fruit is not watery, then you should add a few tablespoons just so the pan doesn’t burn.
THE CHEWINESS
There are many different recipes for making fruit jerky out there, but when I tried them, most would turn out too thin. We like the fruit jerky nice and chewy at my house, so I found a way that works every time! By cooking the fruit down you are concentrating the flavor and taking out some water. The honey gives it that nice soft chew for little mouths.
STRAWBERRY & RHUBARB PUREE JERKY USING A FOOD DEHYDRATOR
PREP TIME : 30 min COOK TIME : 8 hr TOTAL TIME : 8 hr 30 min
Ingredients
2 cups rhubarb
1 cup strawberry or cranberry
2-4 Tbsp honey
1 Tbsp lemon juice
2-4 Tbsp of water (as needed)
Instructions
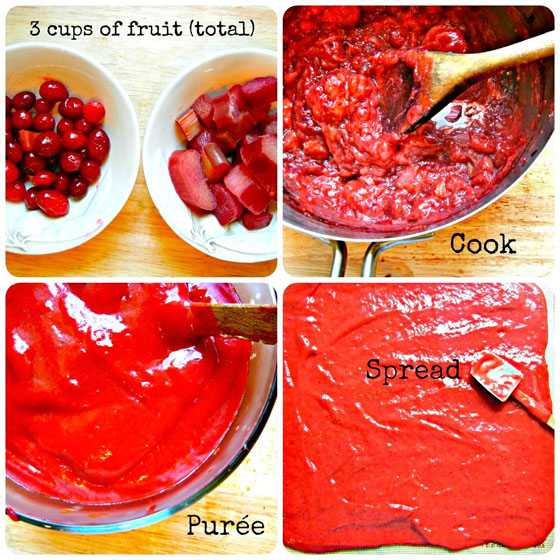
Measure and cut 3 cups of fruit total (your choice). Fresh or defrosted frozen fruit is great.
Add the fruit, honey, lemon juice, and water (if needed) to your pan. Cover with a lid. Cook on low until the fruit is released in juices and combined together. Let it cook down until thickened.
Allow the fruit to cool. Add the cooked fruit to your blender and blend until very smooth.
Spread the thick puree onto a dehydrator sheet lined with Silpat or parchment paper (14″ x 14″). It should be spread on thick. Use a spatula to get a nice even surface (important, so it dries evenly!).
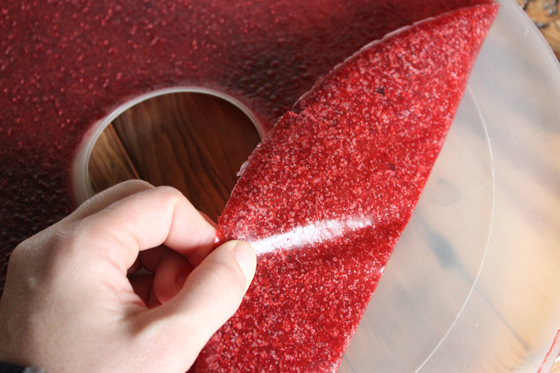
Dehydrate at 58 °C. Takes 8-11 hours depending on method, thickness and fruit of your fruit jerky.
Carefully peel fruit jerky off sheet and cut into 12 strips. Roll in parchment paper strips and seal the end with a staple (an easy and simple way to keep it together, as tape does not stick to parchment paper).
Dehydrating food is a method that has been around for centuries. Thousands of years ago, there was no such thing as freezers, refrigerators, or preservatives in food. Food was either immediately consumed, dehydrated, or salt cured. The sun was the original dehydrator. People would hang food such as meats on racks to dry in the hot sun. Many cultures favored food dehydration such as the Romans. They even constructed “still houses” whose primary purpose was to dry food in climates that did not receive ample sunlight. Large fires were constructed in these houses to create enough heat to dry food, sometimes smoking the food as well.
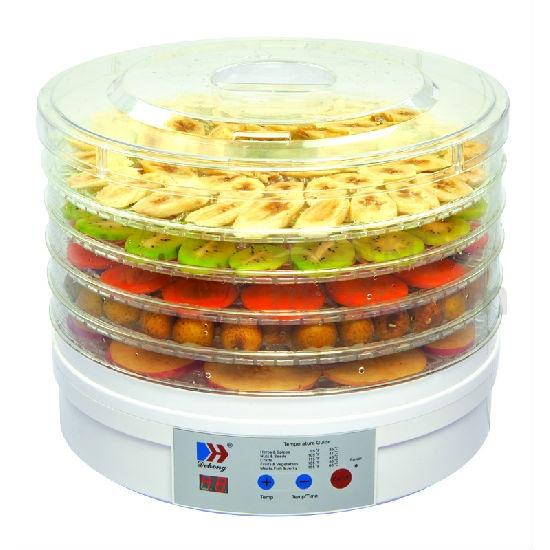
Food dehydration is exactly what it sounds like. It is the process of removing water (the hydration) of food. This prevents the growth of bacteria, helping food that has a relatively short shelf life stay edible for much longer. Dehydrated food takes on an entirely different form. Grapes turn to raisins, meat to jerky, and plumes to prunes. Mushrooms and other various vegetables are also sometimes dried to maintain their potency and flavor. Food dehydrator appliances provide users with much more consistent results than say drying from the sun. The temperature can be controlled and typically ranges from 38 to 68 degrees.
Though most dehydrator recipes are not overly complex, it still takes time to master the art of dehydrating. Once acquired, this skill is wonderfully useful. You’ll be able to make snacks to eat at home or on the go. Backpackers in particular will find dehydrated food useful, as the water weight of the food will be reduced making your load lighter. When you’re down to counting ounces for long journeys, every detail counts. Followers of the vegan and raw food diets will also find food dehydration useful. Since the food itself is not being significantly altered,other than losing water content, it still retains mostly all its nutrients. Electric food dehydrators help simplify the dehydrating process. This appliance is quickly growing in popularity because of its usefulness in the kitchen.
Perhaps, you are simply a do it yourself type of person. Many grocery stores overcharge for food like jerky and fruit leathers. Making this food yourself is much less expensive. You’ll also be able to do it in bulk if you have a larger food dehydrator, leaving you plenty to share with friends and family. Once you have a food dehydrator, you’re ready to go to the local grocery or market and pick up some ingredients. The last piece you’ll need is a few dehydrated food recipes. We are, of course, fully qualified and happy to supply here at Dehong.
The following points are the main benefits of dehydrating food:
Preservation.
Perhaps the most common benefit folks choose to start dehydrating food is preservation. You’ll be able to create fresh fruit that will last up to one year by dehydrating.
Easy and reliable.
Food dehydrators are really quite simple little inventions. You’d really have to mess up to overdry food. We’re talkin’ about 12 hours mess up before you would render food inedible. They last for years before needing replaced. Heck, some people have dehydrators that are 20+ years old.
Health.
Preserving organic food that is locally grown is a great way to help maintain a healthy diet. Bodies appreciate not having artificial flavoring and preservatives from time-to-time.
Backup Food Supply.
Not everyone is planning for the end of the world, but sometimes it is nice to have some canned and dried food options if the power goes out or something like that. A little peace of mind never hurts.
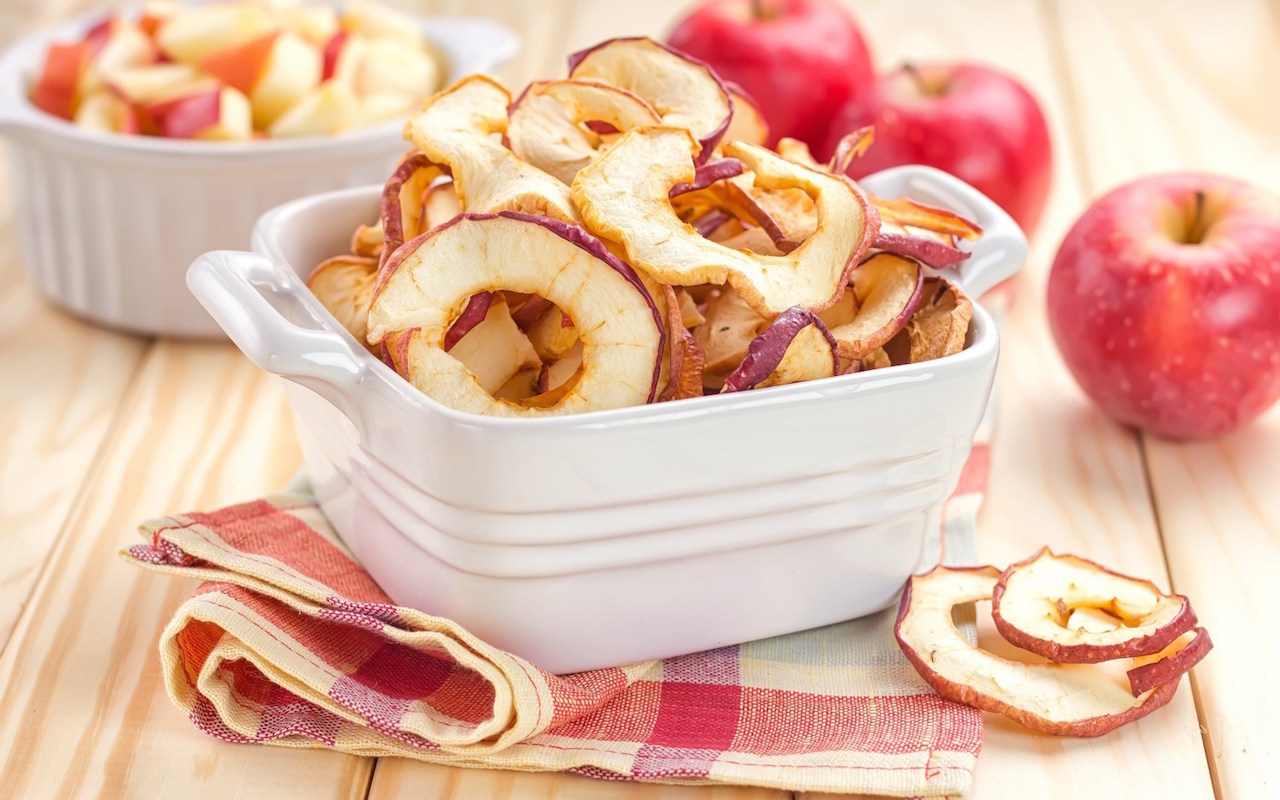
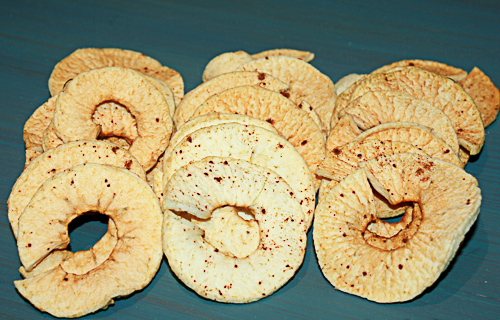
A 5lb bag of apples will make an ice cream pail full of apple rings. But they never last long; they’re a hot commodity in our house. They’re definitely one of the easiest snacks to make, store and take along anywhere.
TIPS FOR HOMEMADE APPLE RINGS IN THE DEHYDRATOR
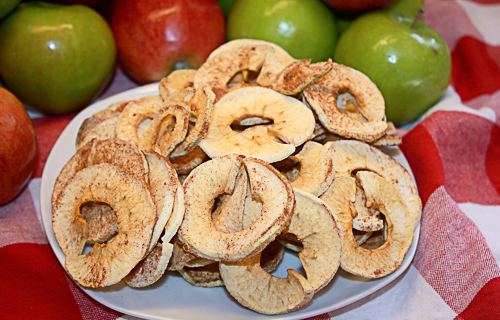
You don’t need to add any sweeteners when drying apples. The natural sugars in the apples get more intense during the drying process making them sweet enough for everyone to enjoy.
Preferably using Spartan, Granny Smith or McIntosh apples that aren’t too sweet. Some apples like Galas become almost too sweet when dried.
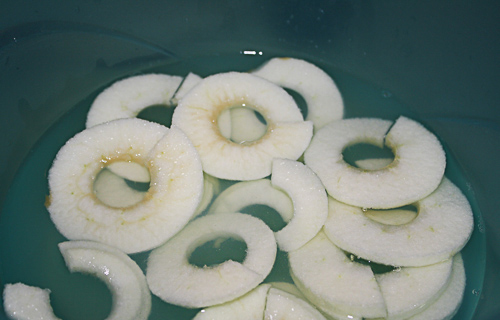
Soaking, dipping or spraying apple slices with lemon juice or salt to prevent browning is completely optional. Look at the photo below, the apples in the center were soaked in lemon juice and water, the others were not. Because the difference is so little, I’ve stopped using any anti-browning techniques when drying apples.
If you prefer the brighter apple rings, soak apple rings in a solution of 1/4 cup (125 ml) lemon juice to 1 quart (1 litre) cold water.
Accept the fact that homemade apple rings will not be exactly like store bought apple rings, they won’t be as soft or pliable. Why? Because most store bought varieties have added preservatives so they can be stored for long periods with a higher moisture content. Your homemade apple rings don’t have any preservatives so they have to be drier in order to store well.
DRIED APPLE RINGS USING A FOOD DEHYDRATOR
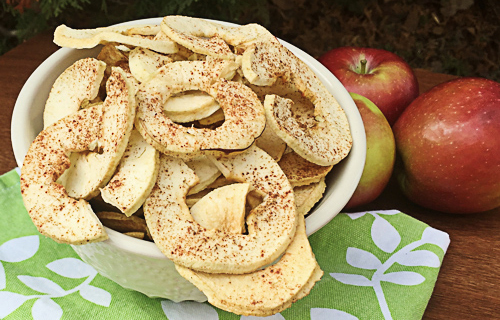
Homemade apple rings are a delicious snack. Make big batches of these and store them in a tightly sealed container, they'll store for months. That is, if they don't get eaten right away!
PREP TIME : 30 min COOK TIME : 6 hr TOTAL TIME : 6 hr 30 min
Ingredients
5 lb apples
3 Tbsp cinnamon
1/4 cup lemon juice (optional)
Instructions
Wash, peel and core apples.
Slice apples thinly and evenly (1/4 inch), use a mandolin if possible.
If desired, soak slices in a mix of 1/4 cup lemon juice and 1 quart water to avoid any browning.
Place rings on dehydrator trays leaving a little space around each slice for air circulation. If you soaked your apples, shake off as much excess liquid as possible before laying on tray.
Sprinkle slices with a light dusting of cinnamon.
Dehydrate at 62°C for 6 to 8 hours.
Check apples for any moisture on outside and inside. The slices should feel dry and leathery without any tackiness. Rip a slice in half to see if there is any moisture on the inside - it should look like dry dense sponge.
Allow to cool several hours before storing in an airtight bag or container.
Store in a dry, cool, dark place for several months